How to Animate a Picture on Mobile, Desktop and Browser Apps
Here are three of the best apps for turning images into videos. We'll show you how to animate a picture on mobile, desktop, and browser apps.

There’s something special about bringing still images to life. Mobile apps have been doing it for years, with plug-and-play filters that anyone can use. Video editing software also offers a number of options, best suited for slideshows. But in the past few months, artificial intelligence has unleashed some next-level image-to-animation tools that could turn the industry on its head.
For example, in February 2024, TikTok announced an upcoming program called Boximator. It generates videos from still images, using box constraints and motion paths to determine which parts of the image move and where they move to. The results are astounding.
Only a couple of weeks later, OpenAI announced their new Sora model and opened access to a small group of beta testers. The app starts with a still image and turns it into realistic animated videos with a high frame rate. It’s not currently available for public use but you can watch videos on their demo page here.
AI animation tools like neural frames also turn images into videos, but with a proper video editor and the option for audio-reactivity. This means the animation can respond dynamically based on what happens in a song. Users just describe a visual theme for the initial keyframe and set some conditions for how the video should unfold.
The results are a trippy frame-by-frame animation that's perfect for music videos and visual storytelling. We’ll dive deeper into these new AI tools, but lets take a moment first to review the most popular apps in this image animation ecosystem.
How to animate a picture with a mobile app
One of the most common ways to animate a photo is with pre-set effects. These are several user-friendly animation apps available for beginners. Mobile apps are often used as a quick and easy way to create motion graphics without spending too much time messing around with professional tools
MotionLeap is popular because you can add motion in a single direction or even trace out complex paths with your finger. This is much easier than trying to learn a program like Adobe After Effects, where the same skillset could takes months or even years to learn.
The most popular option on the App Store is MotionLeap by Lightricks, with close to 117,000 reviews and a 4.8 star rating. We’ll provide an intro on how to use it in four simple steps.
Turning still images into videos with MotionLeap
Step 1: Download app. To get started, you’ll need to access the native app on a mobile or tablet device. iPhone iOS users can find the app here and Android users should go here. It’s free to download but you will find some prompts for in-app purchases.
Step 2: Choose an image. You can find free photos on stock image websites like Pexels and Unsplash. AI image generators like MidJourney, Dalle 3, and Leonardo AI are a good second option. If you find something you like but want to make changes before editing, Adobe Photoshop is generally considered the best photo editor.
Once you’ve got that initial keyframe ready, make sure it’s in a supported file type like jpeg or png. You can use a free image format converter if you need to. Then pop open MotionLeap and load it into a new project.
Step 3: Apply animation to static images.
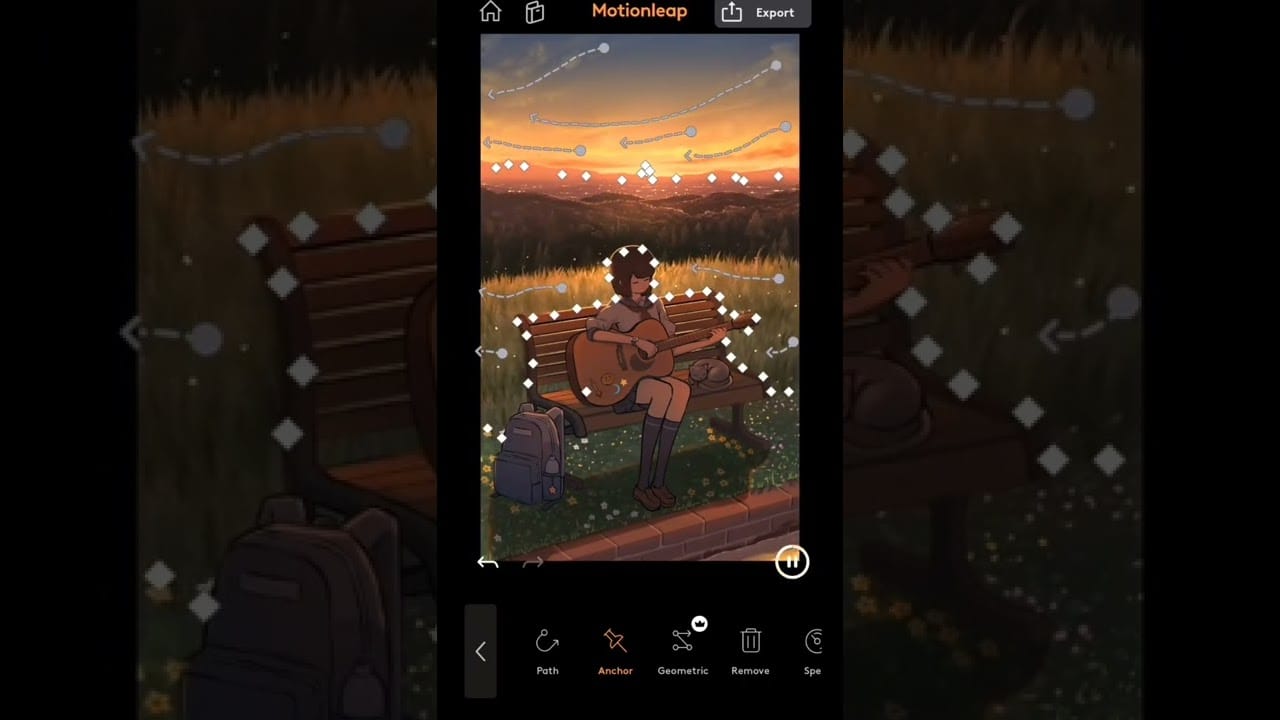
Multiple elements can be animated within a photo and these freeform paths lead to more animations that match the contours of the image itself. Alternatively, you can place anchor points that hold parts of the animated picture in place and freeze sections of a image so they don’t get pulled into other motion directives by accident. This will allow you to add dynamic elements like moving clouds, flowing water, or flickering lights to bring them to life.
MotionLeap also provides camera angle controls, including zoom, tilt and Dolly. If you want the entire image to move, use the tool navigation bar at the bottom of the app.
Step 4: Download as an animated gif or video file. MotionLeap supports a few different formats for saving. You can download direct to your device or upload it straight to Instagram. Simply click the export button located at the top right of the screen, choose your format, and confirm expert again at the bottom of the screen.
If MotionLeap’s workflows begin to feel limiting or you’d prefer to work on a desktop computer, consider Adobe After Effects. It’s an industry standards for motion graphics and offers a more powerful range of animation effects.
You can watch Adobe’s beginner’s tutorials to get bite-sized overviews of all the basic skills that you’ll need to build, from loading templates and compositing. If you’re new to photo editing, check out these photoshop tutorials for ideas on how to improve your initial image. Desktop apps like this do require a mac or windows machine.
Price: MotionLeap is free for limited use, after which you’ll be asked to pay anywhere from $9.99 to $59.99. Pricing depends on whether you want unlimited access on a monthly or annual rate.
Animate pictures with video editing software
Traditional video editing software like Adobe Premier or Final Cut Pro focuses on “transition animations” rather than motion graphics. These editing tools are best for slideshows rather than the surreal animations of MotionLeap. For a quick and easier solution, check out InVideo’s Picture Video Maker. You’ll be able to work on your web browser at a fraction of the cost.
Step 1: Sign up for Invideo. Open your desktop browser and sign up for free at InVideo. We’ll assume that you already have an image ready to go for the rest of this tutorial.
Step 2: Upload your image. Click on the upload icon in the top left corner of the screen to add your image asset. Use the upload media icon to select the jpeg or png file from your computer. Alternatively, you can drag and drop the files directly into InVideo’s media panel located on the left half of the screen.
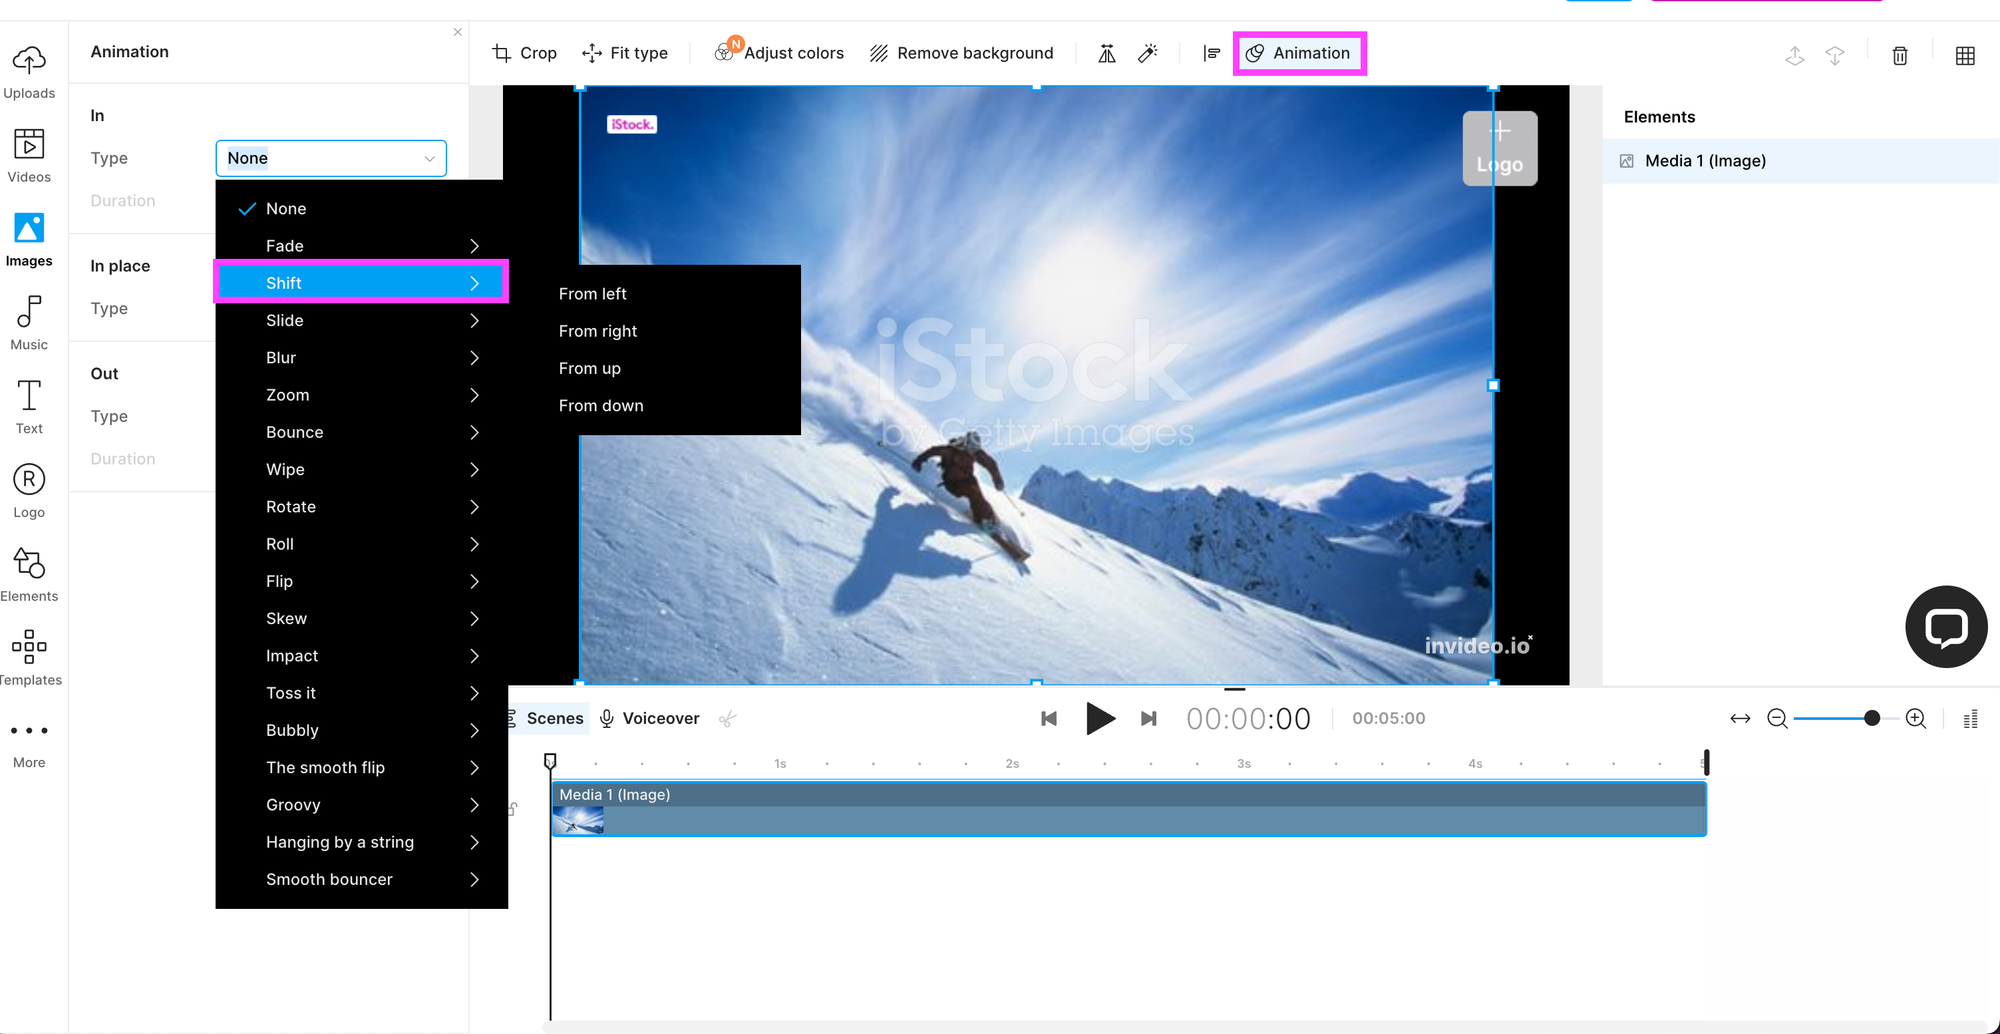
Step 3: Select your animations. Locate the animation button, in the tool bar above the video player. Click it to open the animation effects panel and review the three options available. The in and out options are identical and consist of a long list of transition effects:
- In and Out animation options: Fade, shift, slide, blur, zoom, bounce, wipe, rotate, roll, flip, skew, impact, toss, bubble, and hang by a string
- In place animation options: Pan left/right/up/down and zoom in/out.
Step 4: Animate text. If you want to lay text on top of your animated video, click on the Text icon in the left navigation menu. Select your font style and enter the text as a new layer on the video timeline. The same animations can be applied to this text layer that were available on the still image.
Step 5: Export video. You will need a paid subscription to export video from InVideo. A monthly plan will run you $30 or you can subscribe annually for a 50% discount, bringing the cost down to $15 per month ($180 per year).
AI music videos: Animate pictures with neural frames
Now that we’ve covered the most popular mobile and desktop apps for animating pictures, let’s have a look at the next generation of animation tools. Artificial intelligence has opened up a whole new world for frame-by-frame animation.
For this tutorial we’ll be walking you through neural frames, an AI animation generator, and showing you how to turn any picture into a music video or storytelling visualizer.
Step 1: Sign up for a free account. To get started, head over to neural frames and sign up for a free account. You’ll be able to generate your first images and animations for free.
Step 2: Create your first still image. Once you’re logged in, create a new project and choose an image model. Each option comes with a different visual style and will define the aesthetic of your final animated video. Provide a text prompt that describes the content of the image, as you would with any other AI powered text-to-image generator.
Step 3: Upload an audio track (Optional). With your first keyframe in place, it’s time to upload the music that you’ll be building the animation around. Neural frames provides a stem separator so you can isolate the instruments driving your image modulation. It references the loudest peaks in your track (audio transients) and makes adjustments according to the parameters that you’ve set.
The best instruments to use are percussive kits like a snare or kick drum, or occasional stabs from a synth or guitar. It’s not so much the instrument but the frequency of the transients. If the trigger happens too often, your audience will have a harder time feeling the synchronicity of audio and visual.
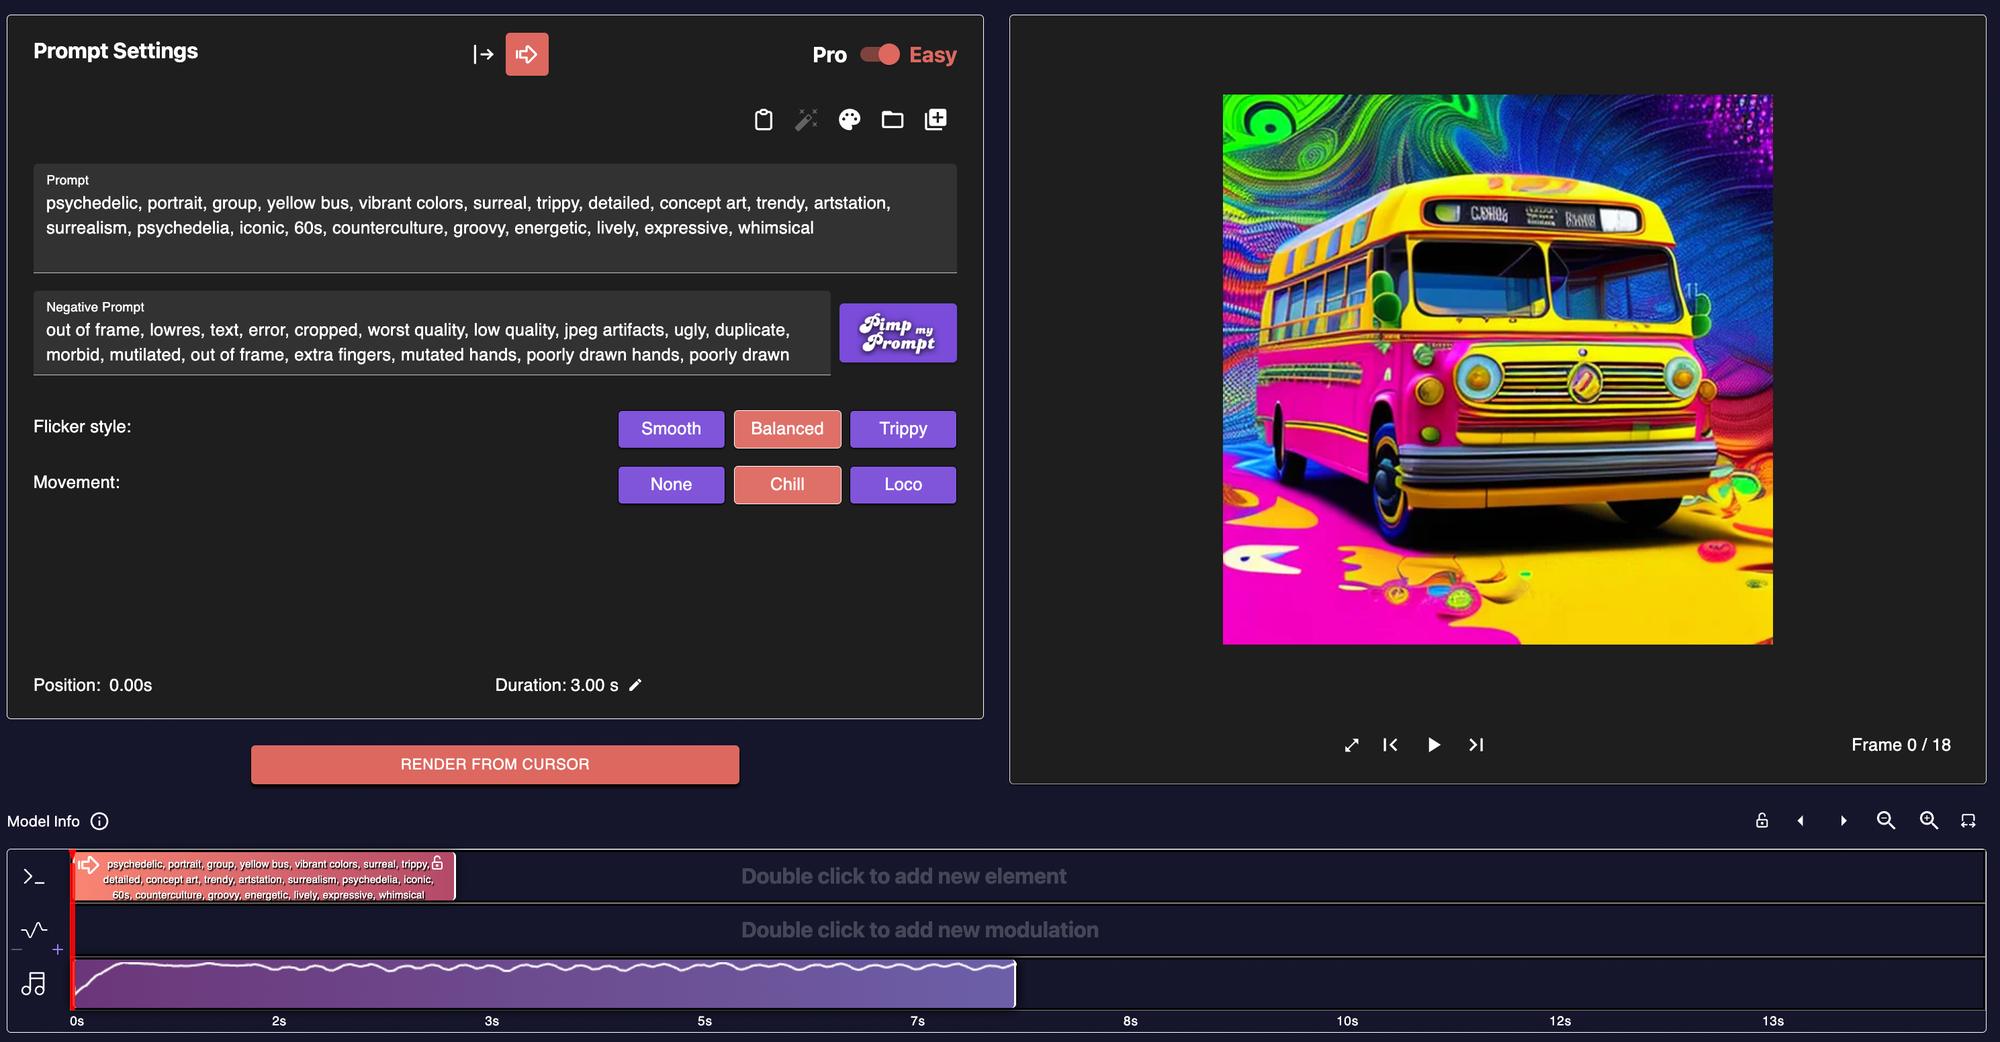
Step 4: Render your animated video. Choose a rendering length and neural frames will reference your initial keyframe picture, following your instructions to zoom or pan at a chosen speed. Rotations are available across three dimensions, using a Z-axis that creates the illusion of depth. You can define a target picture to animate toward with the transition box feature.
Power users typically generate across short durations to maintain maximum control over the imagery. Repeat this process continually until you’ve covered the full length of your song.
Step 5: Export your animated picture as a video file: When you’ve finished the project, navigate to the top right corner of the video editor dashboard. Click the “folded page” icon to begin your export process. Neural frames offers you the option to upscale to 4k, but you’ll need a paid account to do that. The final video file will be in an mp4 format.
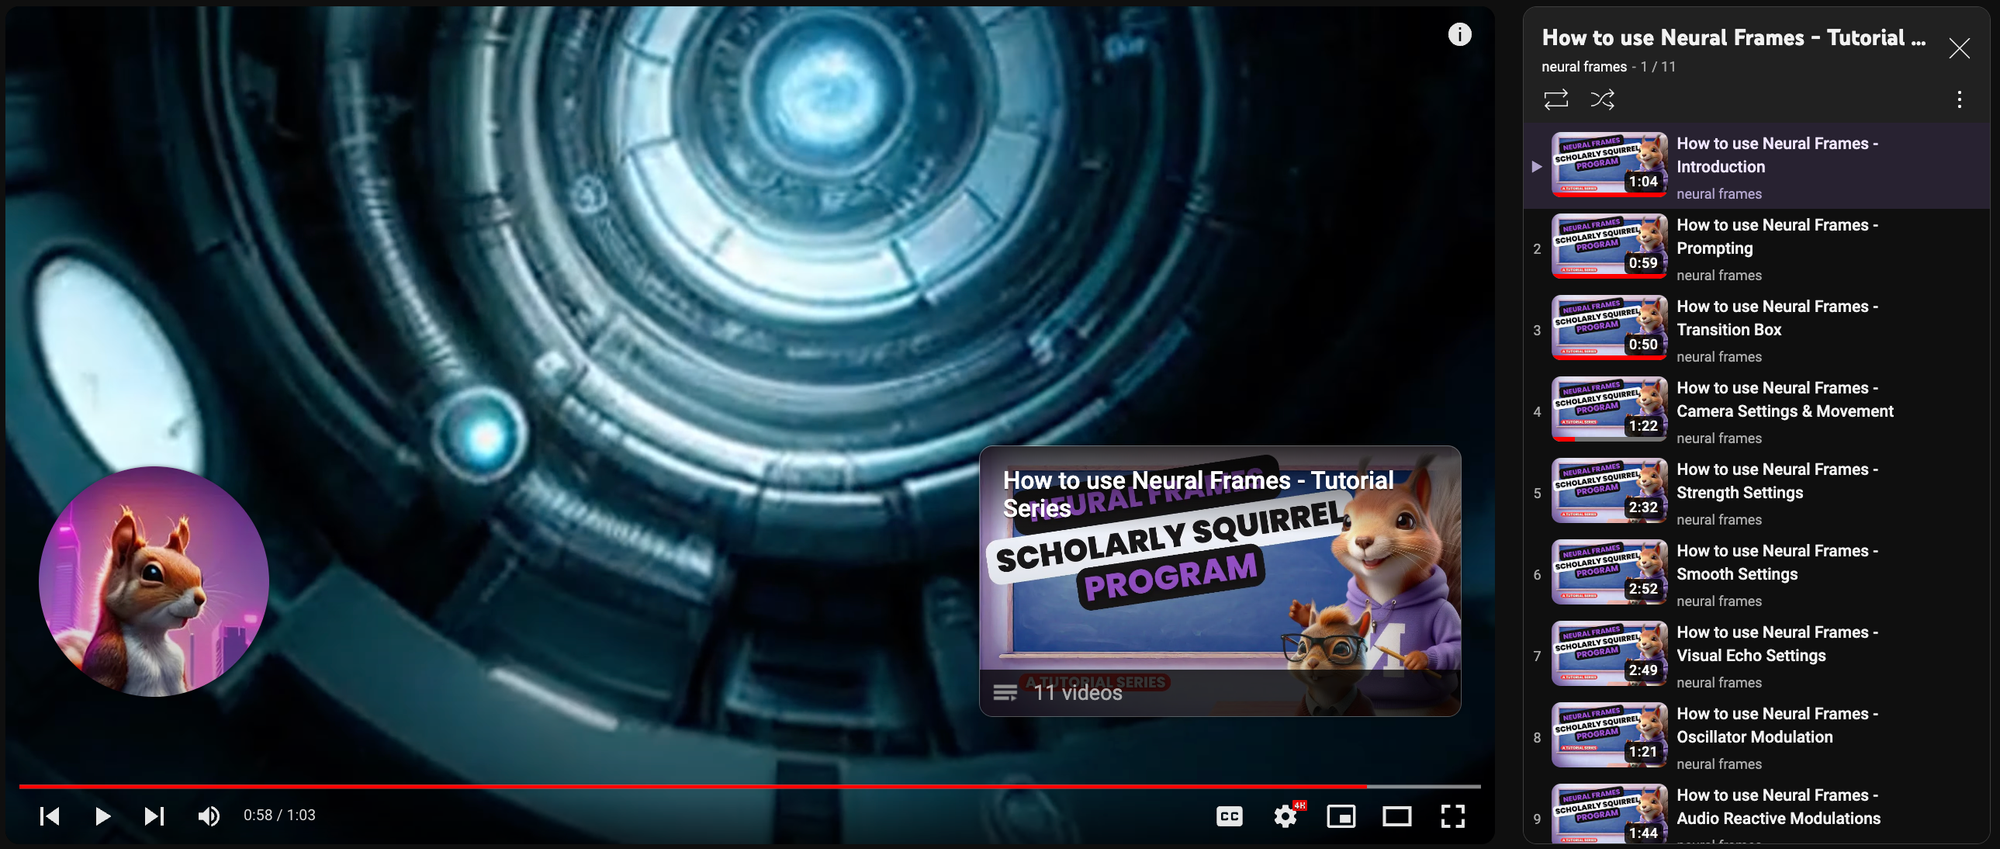
That’s all there is to it. For a more detailed tutorial, check out the playlist above from the neural frames Youtube channel. You’ll find eleven videos here covering everything from image prompting, transitioning between static images, camera settings and movement, and guidance on how to keep important figures in your imagery consistent with the visual echo feature.
Creating a single frame used to be a time consuming manual process, but image generators like Midjourney and Stable Diffusion have brought that creative time down to a tiny fraction of what it used to be.
Frequently Asked Questions about Turning Still Images into Animation
Q: What is the easiest way to animate a single photo on my phone?
A: MotionLeap (iOS and Android) is still the quickest tap-and-drag option. Drop in a picture, trace a motion path with your finger, freeze the areas you want to stay put, and export as a GIF or MP4. Great for social posts under a minute long.
Q: I want richer motion and music sync. Which AI tools should I look at in 2025?
A: Three popular text-to-video models stand out:
- Neural Frames – web-based editor that starts from either a prompt or an uploaded image, then lets you drive zooms, pans, and rotations with individual stems from your song. Visual Echoes keeps characters consistent frame to frame.
- Runway Gen-3 Alpha – excellent for cinematic camera moves and film-style color but currently lacks deep audio-reactive controls.
- Kling 2.1 – generates fluid, high-FPS footage straight from prose descriptions and supports limited in-painting for touch-ups.
If music timing and iterative control matter most, start with Neural Frames and layer Gen-3 or Kling clips later in Premiere or DaVinci.
Q: Do I need my own graphics card to use these AI video generators?
A: No. All three run in the cloud. Your local GPU helps only during playback or editing; rendering happens on the provider’s servers. A recent laptop CPU and a solid internet connection are enough.
Q: How long does it take to create a full three-minute video?
- MotionLeap slide shows: 10–15 min.
- Neural Frames iterative builds: 45–60 min for most creators because you usually render in short 4–8 sec passes, review, then extend. The autopilot features renders a 5 minute 4k video in 10 minutes.
- Gen-3 Alpha and Kling 2.1 single-pass clips: about 1 min per five seconds of HD footage. Factor in prompt tweaking time.
Q: Can these AI clips be used commercially on YouTube or Spotify Canvas?
A: Check each license: Neural Frames grants full commercial rights on every tier, including the free plan. Gen-3 and Kling both allow monetization but may require crediting or an upgraded subscription for 4K delivery. Always read the latest terms before release.
Q: How do I stop faces or logos from morphing between frames?
A: In Neural Frames enable Visual Echoes and raise the Consistency slider. In Gen-3 Alpha use the “hold subject” tag in your prompt. Kling lets you set a low variation weight. Testing a one-second loop before final render is the safest sanity check.
Q: My song has rapid hi-hats. The visuals feel too hectic. Any fix?
A: Route modulation to a slower stem (kick or bass). In Neural Frames you can solo just that stem. In an external editor you can duck the hi-hat transient band so the AI only hears bigger hits.
Q: Are there free tiers or trials?
- MotionLeap – free exports at SD resolution with watermark.
- Neural Frames – free account includes several HD renders per month, no watermark.
- Runway Gen-3 Alpha – 125 free credits when you sign up.
- Kling 2.1 – limited preview quota then pay-as-you-go.
Q: What resolution should I pick for TikTok or Instagram Reels?
A: 1080 × 1920 (9:16). Neural Frames and Gen-3 both let you set aspect ratio before rendering so you avoid letterboxing.
Q: Where can I learn more about prompt writing and music synchronization?
A: The Neural Frames YouTube channel posts weekly deep-dives on animation recipes, stem settings, and camera paths. Runway and Kling maintain active Discord servers with prompt showcases and office-hour streams.
Ready to bring your static art to life? Sign up for a free Neural Frames account, test a few prompts against your favorite track, then experiment with Gen-3 Alpha or Kling 2.1 for extra stylistic flourishes. Happy animating!