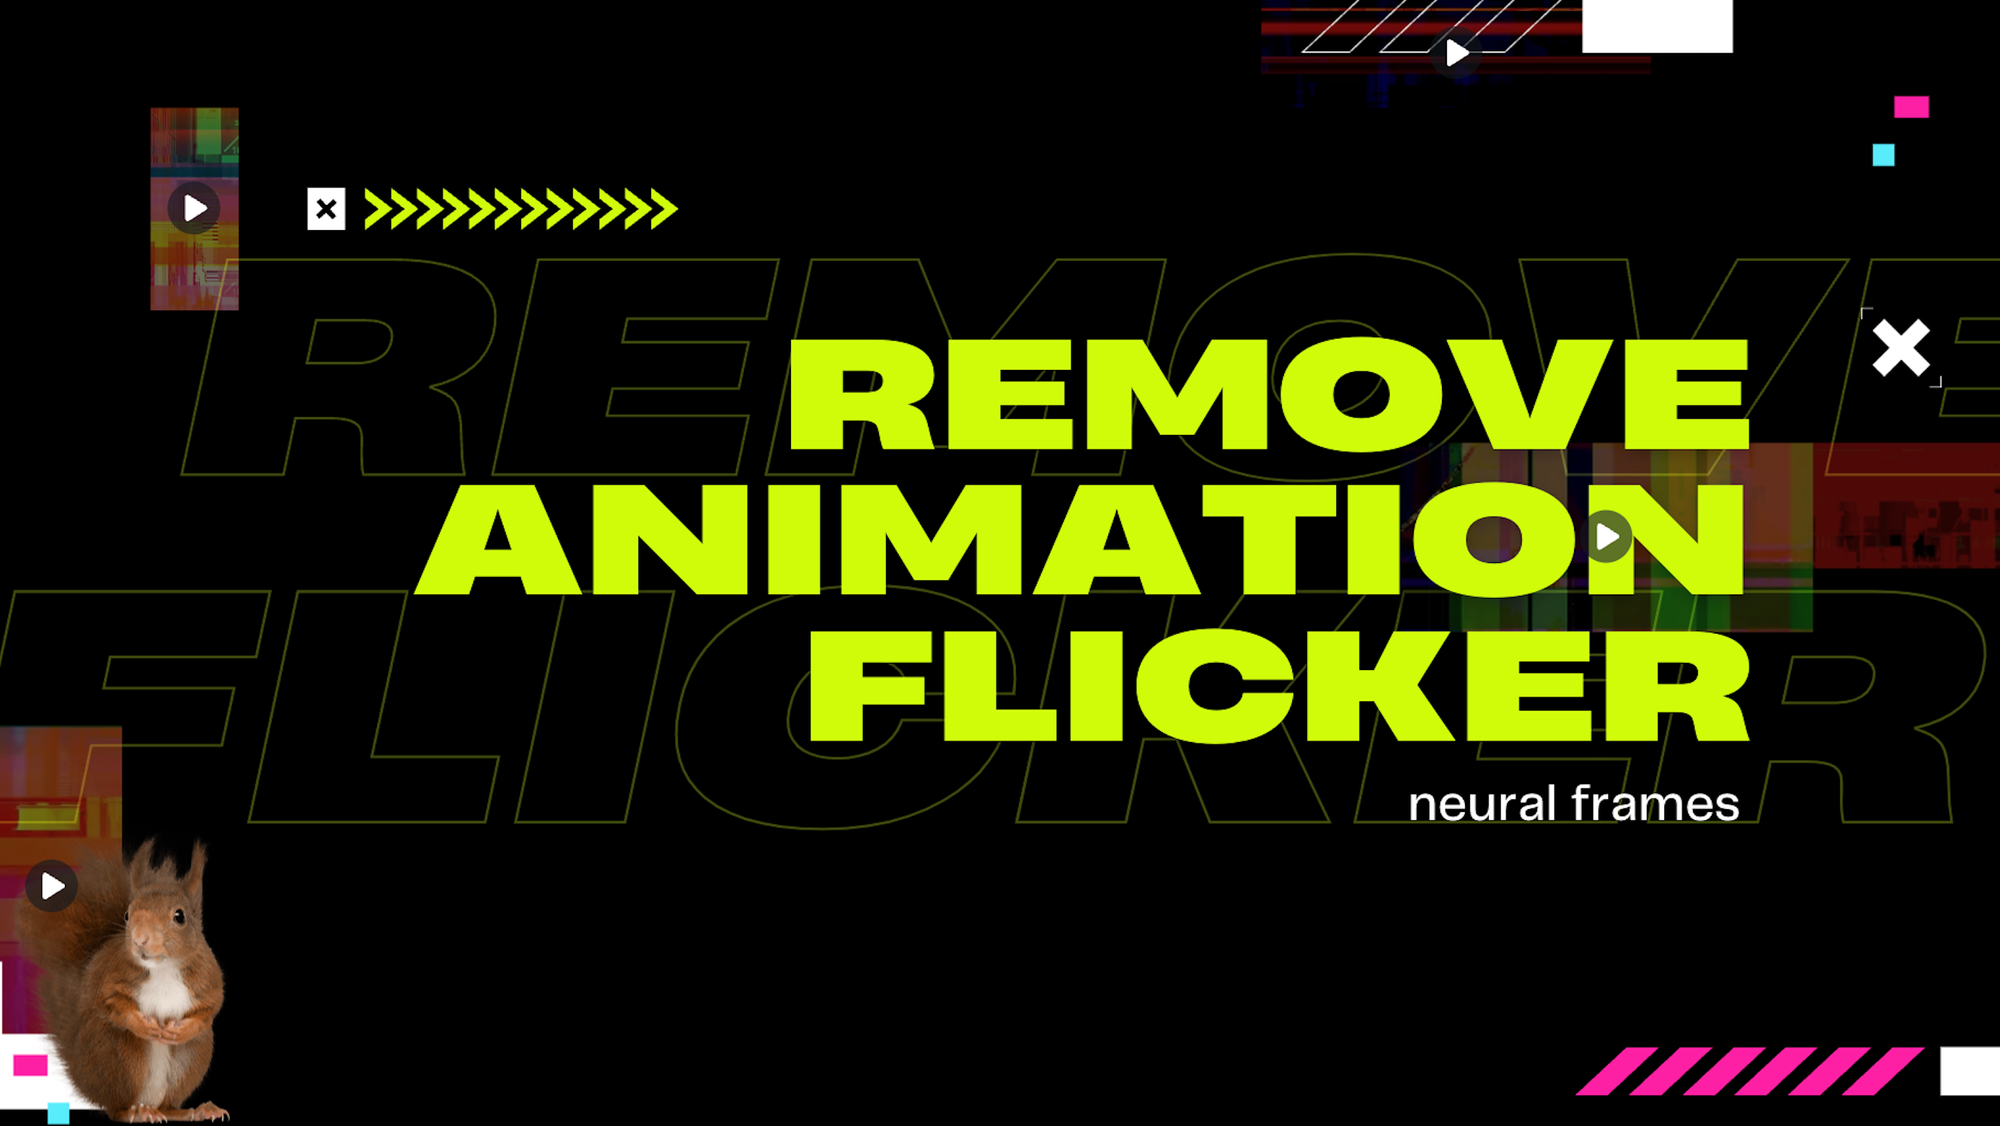
Neural Frames: Remove Flicker Effect From Your Animations
We’ve just rolled out a big update at neural frames this week!
As you may already know, neural frames operates on a frame-by-frame animation model. This rendering technique is capable of producing incredibly unique, audio reactive music videos. However, some image prompts and control settings have been known to cause an unwanted flickering effect.

After lots of hard work (i.e. complex math and programming), we’re thrilled to announce a new Flicker control that will help users to resolve this issue.
In fact, all of the animation settings have been updated from text boxes to slider, resulting in a more intuitive interface. Not only that… neural frames has also introduced a new turbo mode that makes render speeds 4x faster!
Log into your account to check out the new control panel in the upper left corner. Then follow along with us in the follow sections as we explain what's new and how it all works.
Introducing Turbo Mode
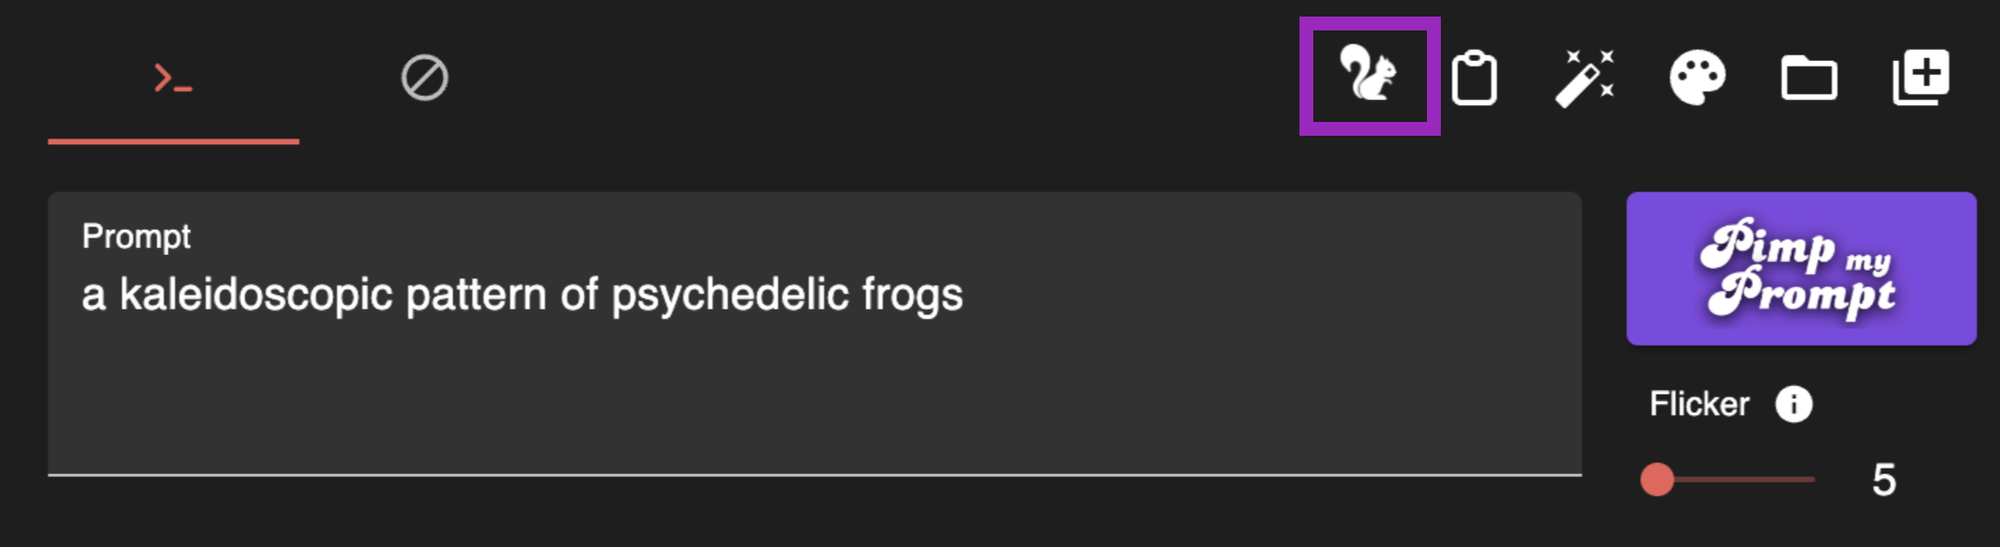
Turbo mode is accessible via the squirrel icon located on your tool bar above the text prompt area. Click on that before hitting generate and you'll boost your render speeds significantly.
Just be aware that, depending on your settings, this may also reduce the final image output quality. It depends largely on your image prompt, model and settings. Low and slow is still always going to be the safest option.
What is the flicker and how does it work?
Below that tool bar, directly under the pimp my prompt button, you’ll find a new flicker slider. The value ranges from 0 to 100 and when it's cranked up to the max, that's when you see the greatest flickering effect.
So naturally, to eliminate flicker you should bring the value down close to zero. However, there are a couple of important details to consider before you drop it all the way down and hit render. Follow these instructions for the best result:
If you're not applying camera motion: Use a low flicker setting with high strength, with Edge Echo and Tile Echo sliders set to zero.
If you do want to apply camera motion: Use a low flicker setting with high strength and high Edge Echo. For reasons we’ll discuss below, camera motion can still lead to flicker in some cases.
What is the flicker effect and how does it work?
Want to nerd out with me a bit and understand where the flicker comes from in the first place? I hope the answer is yes – learning the basics here will empower you to get better results with neural frames too!
Diffusion models create images in an interesting way. They typically start from noise and go through a complex process to turn that into a picture.
There’s a second type of diffusion model, called image-to-image, that adds noise to an input image in order to create variations. The quantity of noise there is controlled by a Strength parameter. In neural frames, this is what’s happening when you adjust the strength slider!
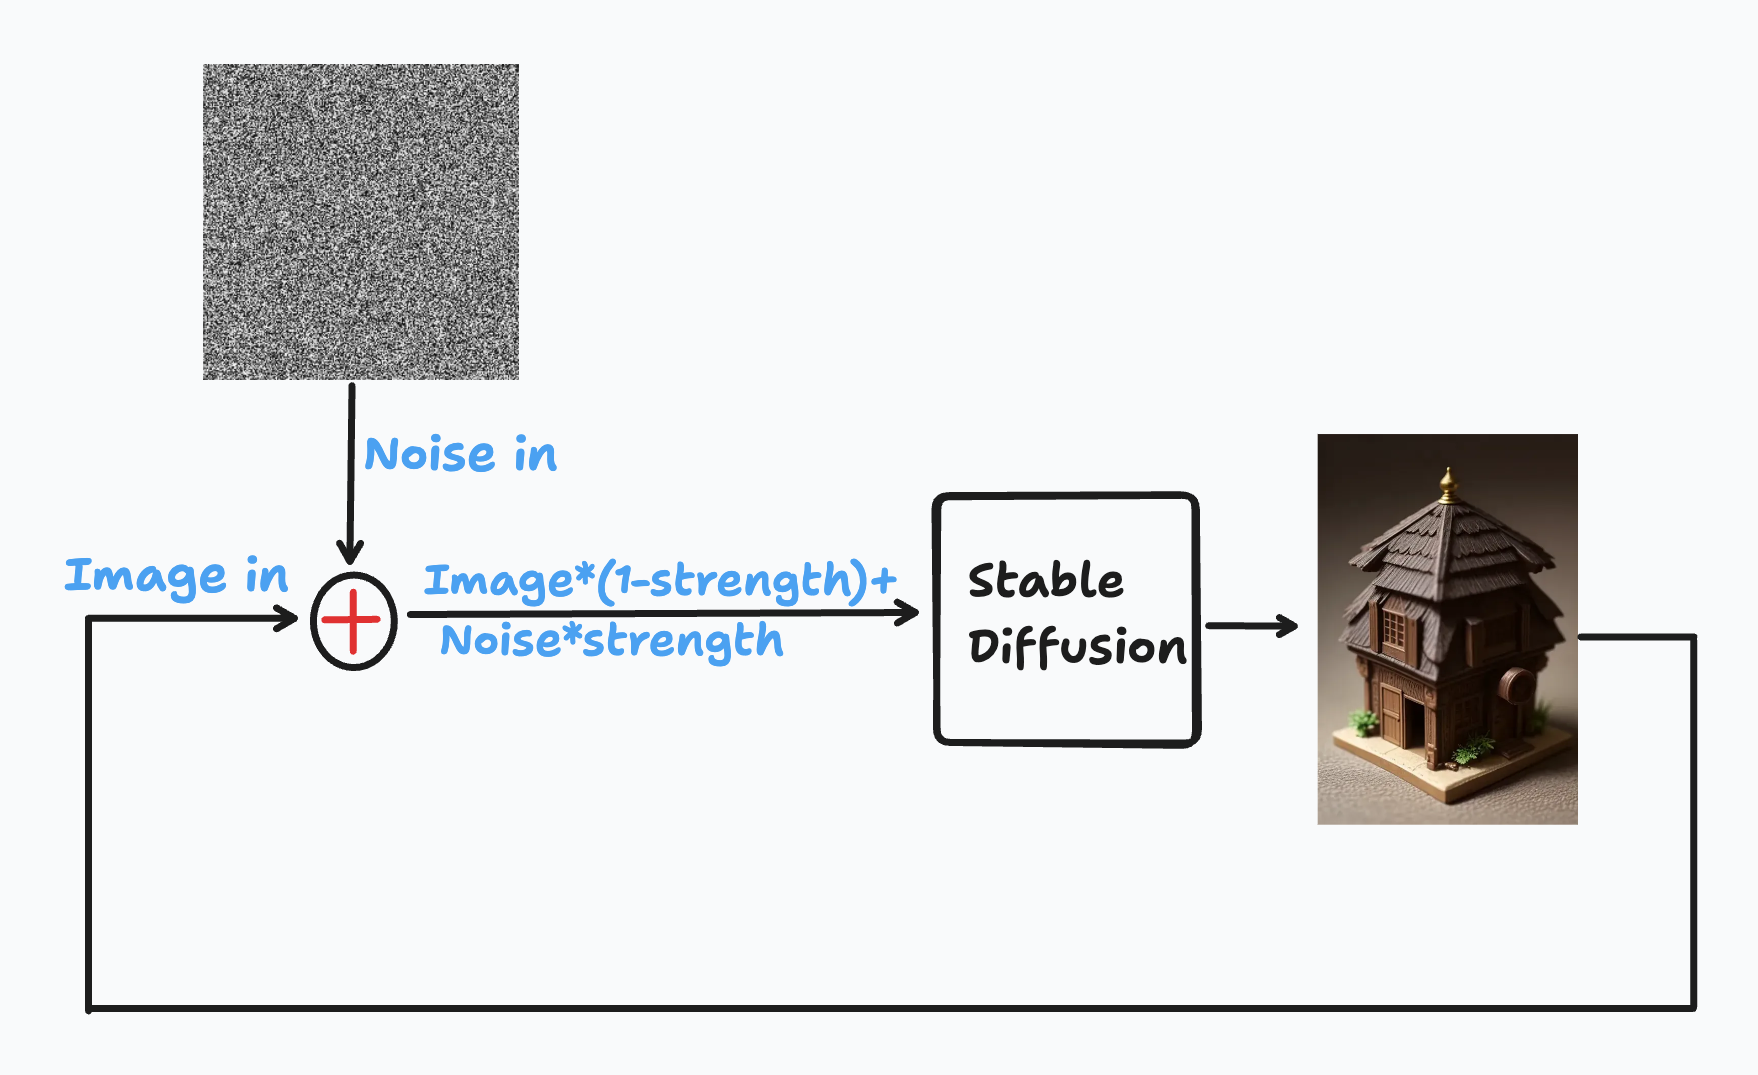
With our traditional render technique, the noise pattern added to each frame is unique. Each frame stems from a completely new noise pattern. Animations are made up of 25 frames per second and that constant change is responsible for the flickering effect.
The images on the right side are generated from the noise on the left side. Each frame stems from a completely new noise pattern.
Some people who are smarter than me (As so often, the deforum crew did awesome pioneering work here) proposed a cool idea. What if these noise patterns were related to another, rather than independent and constantly changing? Can we move one noise pattern to the next in a smoother way?
The short answer is yes, we can do that, and it works! Your new Flicker slider controls how much the noise patterns differ from each other.
When you dial it up to 100%, each noise pattern is entirely new, so flicker is likely to happen. Reducing flicker to 20% means that every 5 frames, there will be a completely new noise pattern. In between those frames, we apply something called interpolation, to create smooth transitions.
flicker 10%, strength: 1
The lower your flicker setting is, the less of that flickering effect you’ll see in the animation. The concept sounds simple, but the math was quite tricky to figure out!
Choosing your strength, motion and echo settings
When your flicker slider is low, consecutive noise patterns will be similar from one frame to the next. Now here comes a catch: If you opt for low strength settings, the input images will stay very similar. This makes sense, right? You have an input image, add to it almost the same noise pattern in subsequent frames, so there won't be much change over time. Stable Diffusion doesn't really like that. As a result, you will hit a kind of feedback loop that looks like an ugly, colorful ant colony as seen below:
With a strength of 0.6, Stable Diffusion runs into a feedback loop, leading to an undesirable deformation of the images.
This means: When you go for a low flicker value, you've got to make sure your strength is set to very high value, 0.8 or even 1. This ensures that you have a healthy amount of noise in the system and that you can get a fluid animation from the model.
flicker: 2%, strength: 1
However: With a high strength setting, the camera motion doesn’t really work anymore. To understand this, let us look at what camera motion actually is.

Camera motion is achieved using a warp algorithm applied to each image frame. The warped image is fed into Stable Diffusion to create the following frame.
But here's the catch: As we explained, a high strength setting is required to reduce flicker.
High strength means the initial input image is mostly ignored. If the input image is ignored, then the warped image that creates camera motion won’t be taken into consideration.
With high strength and low edge echo, camera movement is ignored by the AI and leads to jittery behavior.
Fortunately there’s a workaround for this issue.
Neural frames comes with a slider called Edge Echo, that will allow you to keep a high strength value and retain the edges from the warped image when creating the next frame.
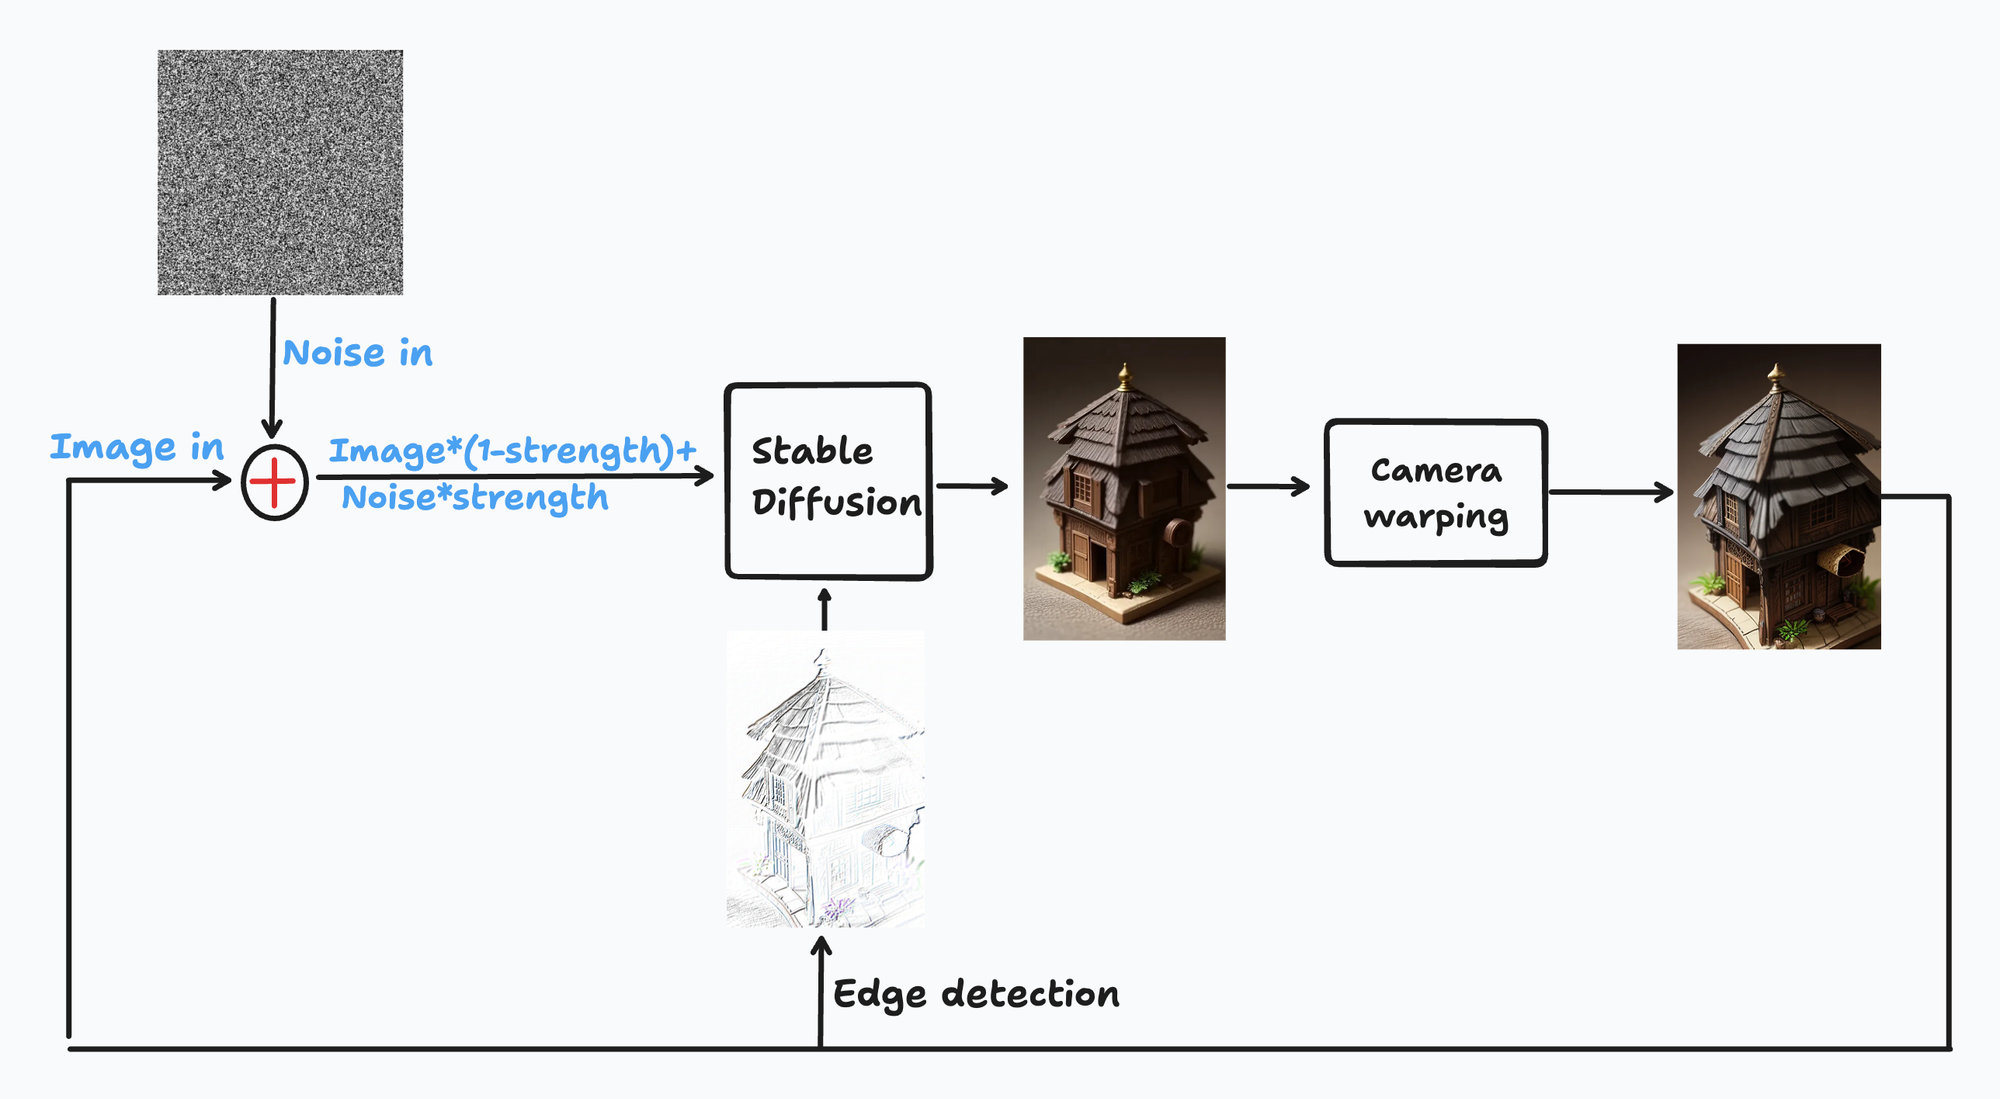
This forces Stable Diffusion to keep the edges where they are in the warped image.
We do achieve motion of the camera with Strength=1, Edge Echo=0.8, Flicker=11% however it starts flickering again.
Nice, we solved the problem and can now move the camera, even with higher strength. Since this is a workaround, you may still run into some flickering issues if you apply camera motion.
My personal recommendation: Use low flicker / high strength without Visual Echoes and without camera motion. If you want camera motion, use either low strength with or without visual echos or use high strength with visual echoes.
This video has 0 Flicker, i.e. the noise pattern doesn't change and is only changed by the modulation inputs. We also modulate the tile echo.
Happy rendering!