How to Make a Lip-Sync AI Music Video (Step by Step)
Make an AI singer, or a photo of yourself, perform your song. The Vocal Video workflow step by step, plus the craft that separates a good lip-sync video from an uncanny one.
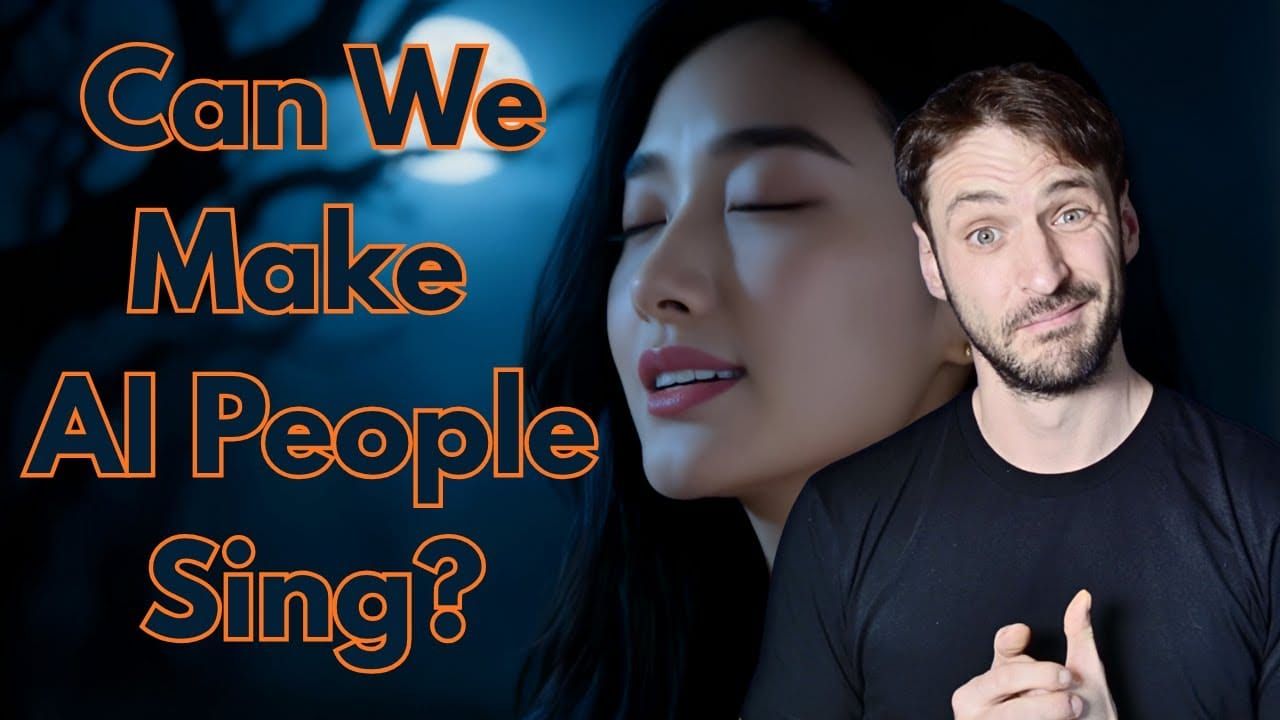
A lip-sync video is the closest thing to a real performance video you can make without a camera crew: a singer on screen, mouthing your lyrics in time, cut together with scenes that carry the mood of the song. With Neural Frames' Vocal Video mode you can make one from an audio file and either a text description or a selfie. In the tutorial below, our founder Nico made one in about five minutes without changing a single frame.
This guide walks through that exact workflow and then goes further: how to pick a performer image that syncs well, why the vocal matters so much, how to balance singing shots against B-roll, and how to get the finished video in front of people.
What a lip-sync AI music video is
In a classic AI music video, the visuals follow the mood and structure of the song. In a lip-sync video, a character also sings: their mouth moves with the words on the lines where performance makes sense.
That matters because performance is what most music videos are built on. As the Toronto production company Rich Prince Media puts it in their guide to performance shoots: "The performance is the heart of most music videos. Even narrative videos usually cut back to the artist singing."
Neural Frames calls this technique Vocal Video. It launched alongside Lyric Showcase in our October 2025 product update and has improved since.
Step by step: the workflow from the video
Here is what Nico does in the tutorial, in order.
1. Upload your song
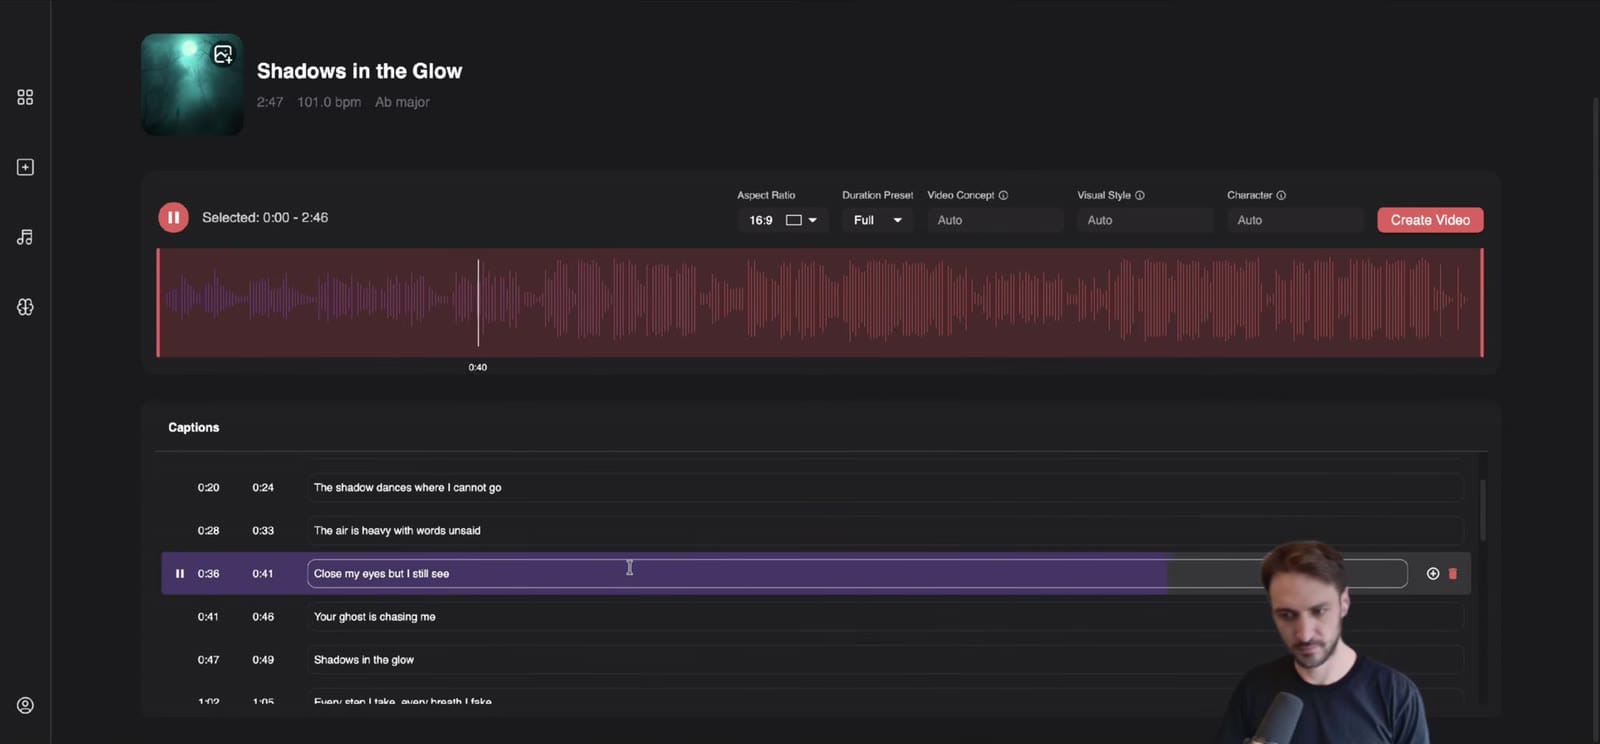
Nico uploads a track he made with Suno that morning. Neural Frames analyses it straight away and extracts the lyrics automatically. That analysis is what Autopilot uses to plan the video and decide where the singing goes.
2. Set the basics
- Aspect ratio: he picks 16:9 for YouTube. If the video is mainly for Shorts, Reels or TikTok, choose a vertical format here instead of cropping later.
- Song range: he keeps the whole song. For a teaser, select only the hook.
- Video concept: he leaves it empty to see what the AI suggests. You can write your own concept and control the video in much more detail, but leaving it blank is a good way to start.
- Visual style: he keeps Auto, the realistic default.
3. Create or upload your character
This is your singer. You have two options:
- Generate one from text. Nico types "a beautiful mid-20s female, black hair, white dress", gets four options, picks one and names her Anna.
- Upload a photo. In the second half of the video he uploads a selfie he had just taken, names the character Nico, and lets Autopilot build the concept around it.
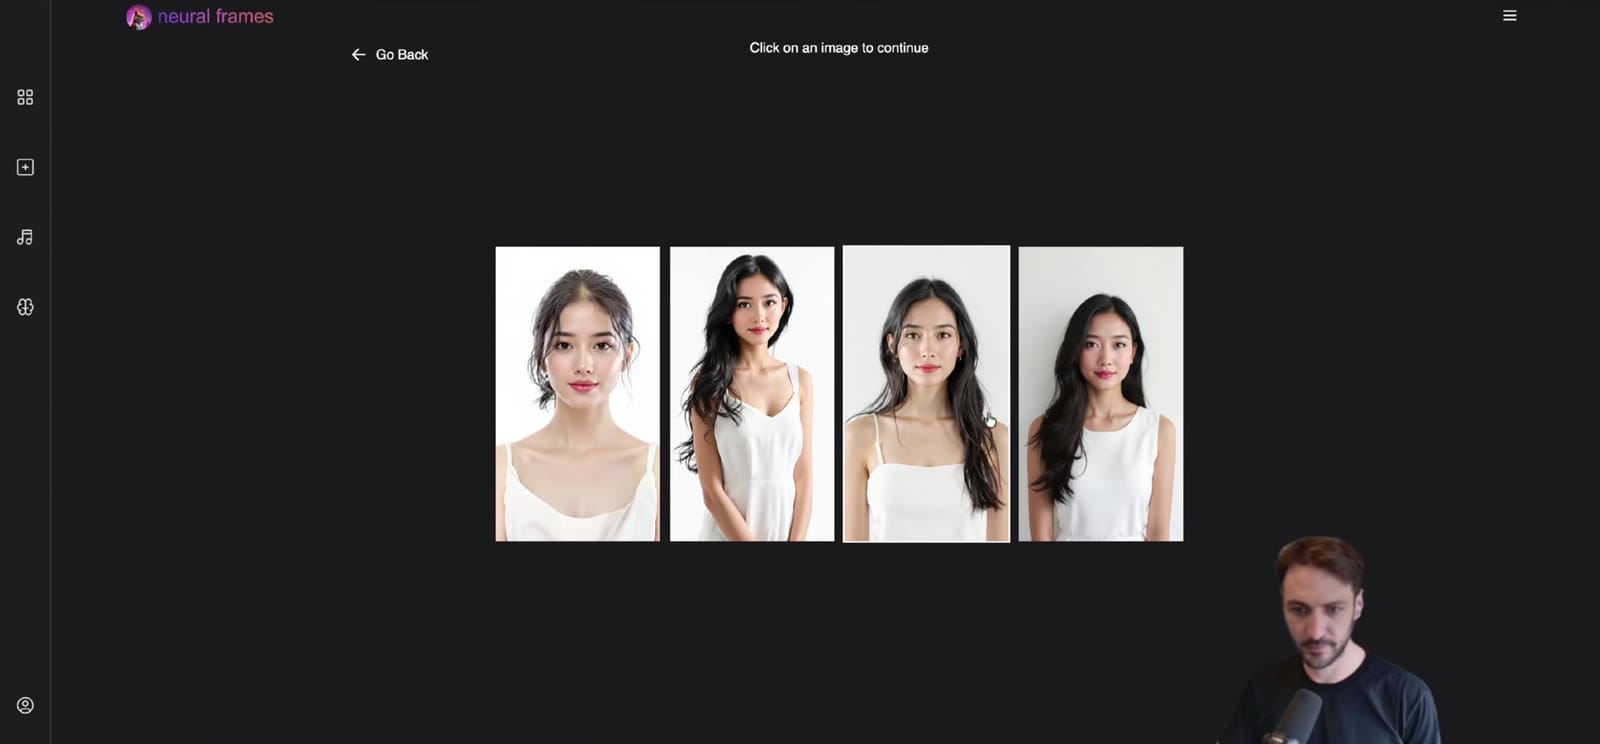
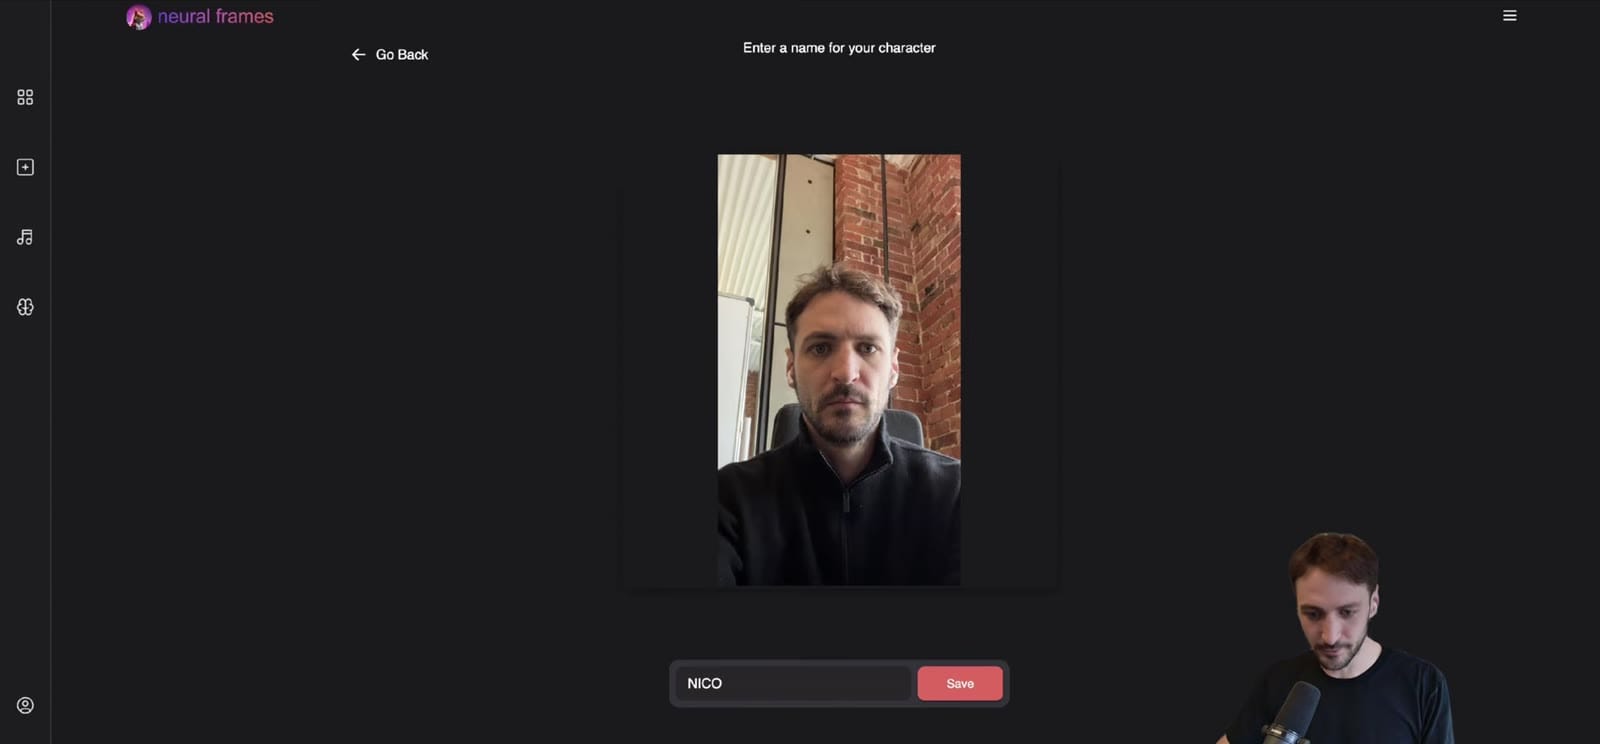
Our character editor keeps the same face across the whole video. If you upload yourself and want the result to look as close to the photo as possible, skip the visual style.
4. Choose Vocal Video as the technique
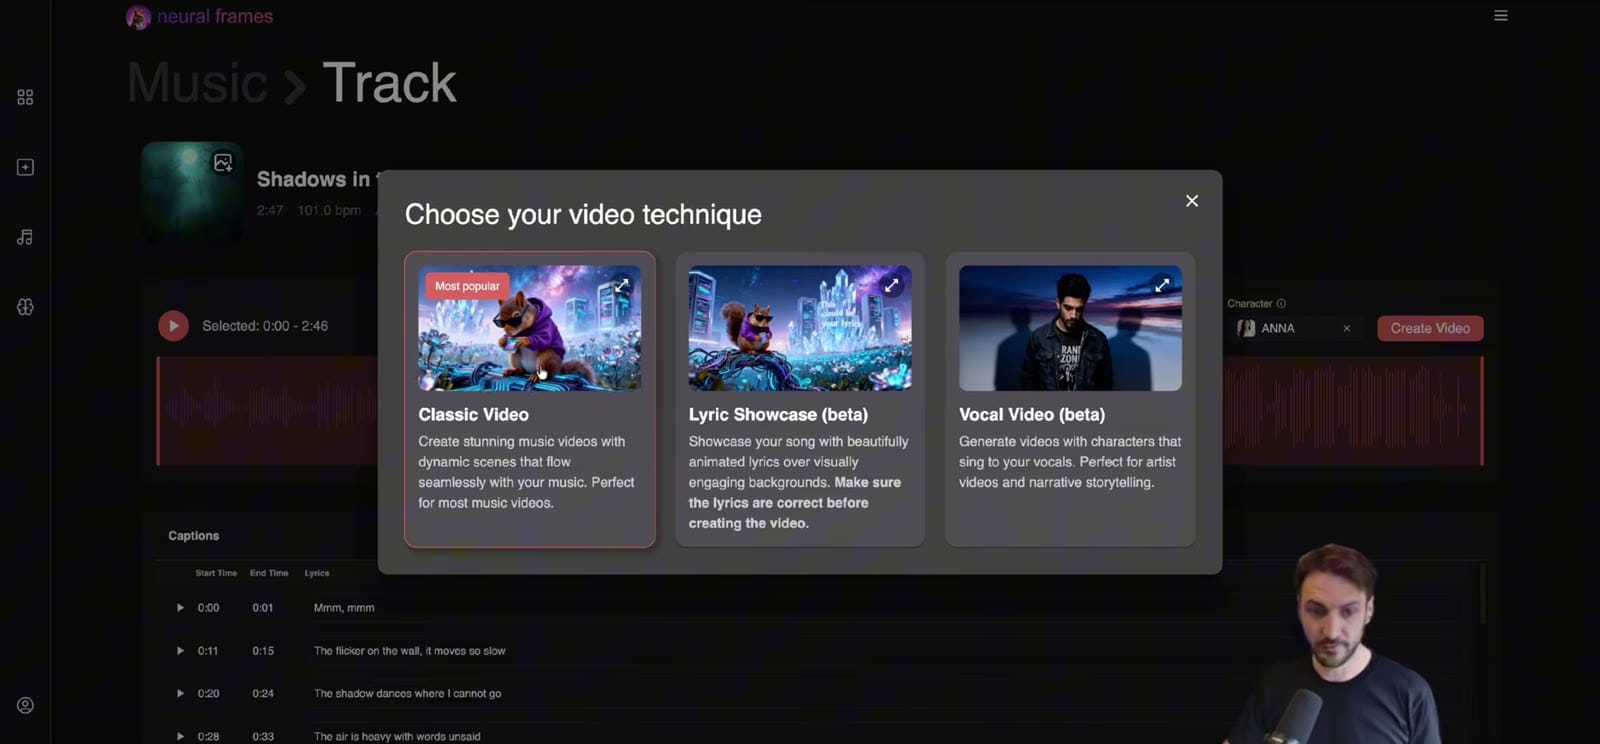
After clicking Create video, you choose between three techniques: classic music video, Lyric Showcase, and Vocal Video. Pick Vocal Video for lip-sync.
5. Check the storyboard
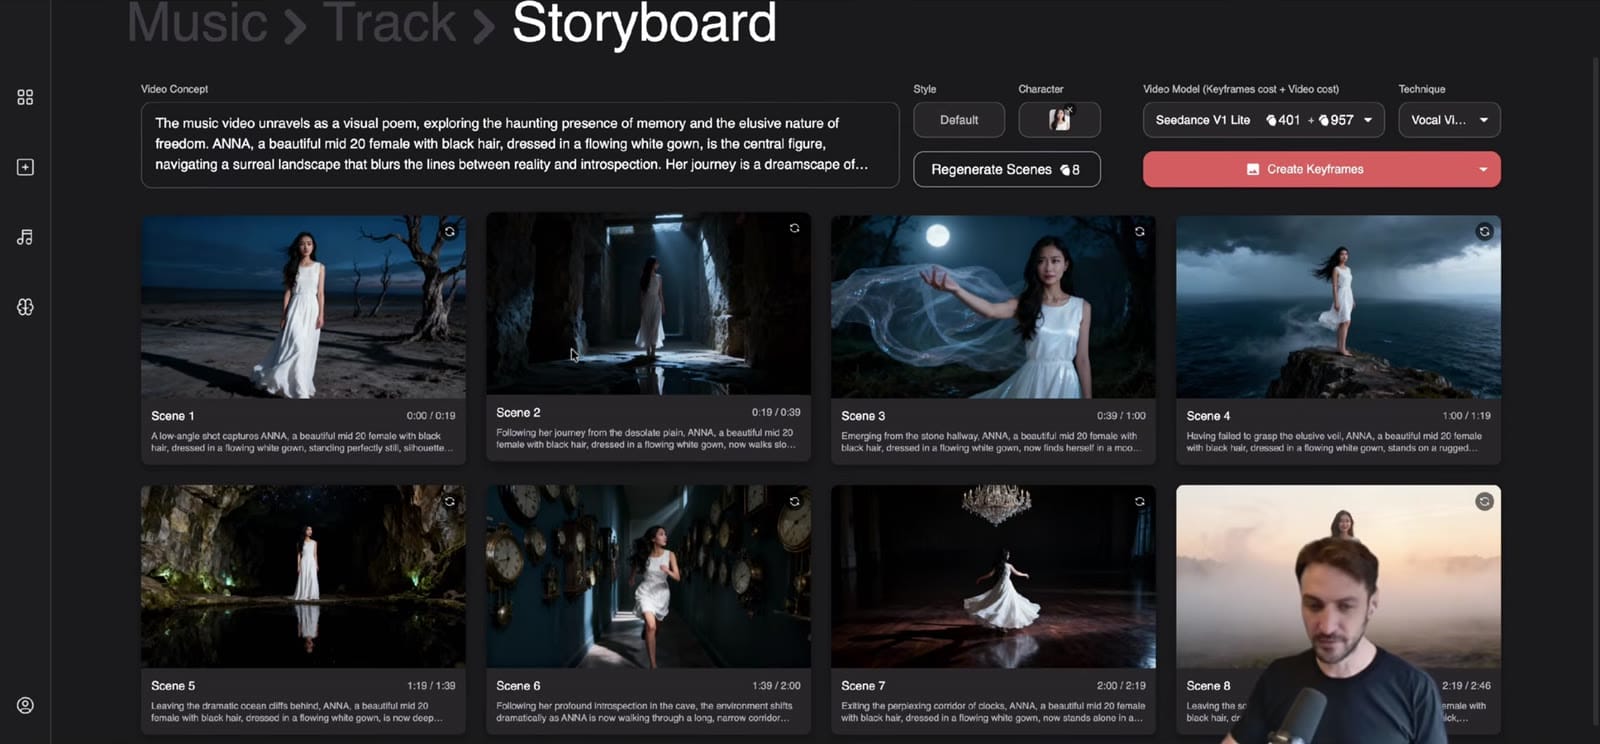
Autopilot now fills in a visual concept and shows a storyboard. In the demo it is a journey through different scenes: moonlight, clocks, dancing, ending with the character smiling.
Treat the storyboard as a cheap mood check, not the final frames. The images won't appear one-to-one in the video. If the vibe is wrong, change the concept now, while changes cost little.
6. Pick a video model
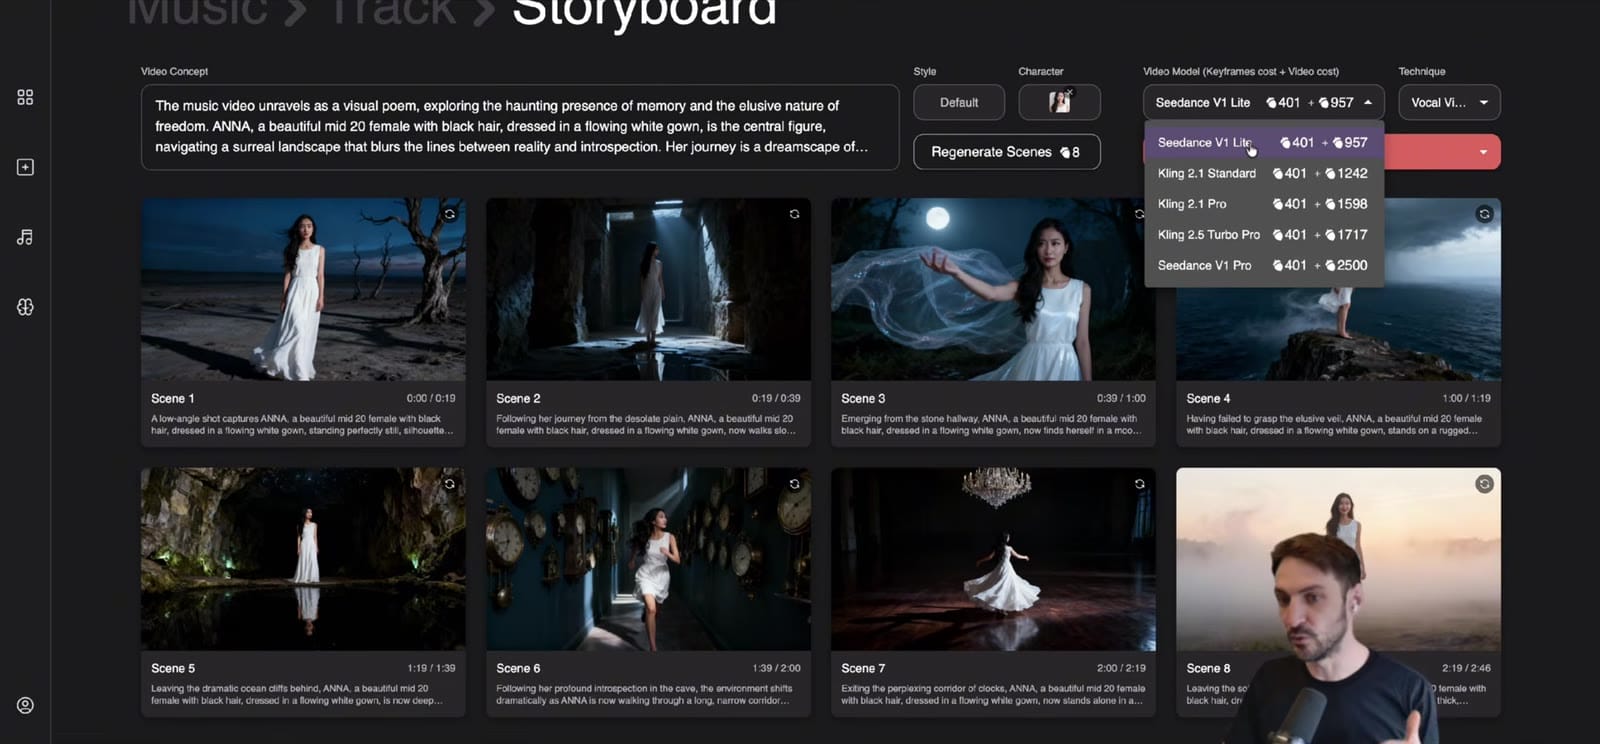
At the time of recording there were five video models, ranging from good value to premium. Nico uses Kling 2.5 Turbo Pro for the first video and Seedance Pro for the selfie video. The model list changes as new ones come out, so check which ones are current when you render. Our image model guide explains how image and video model choices work together.
7. Generate keyframes and review them
Click Create keyframes, then go through each one. Ask one question per frame: does it fit the line of the song it sits under? Nico flags one shot he isn't sure about and decides to fix it after the first render.
8. Render, then fix what doesn't fit
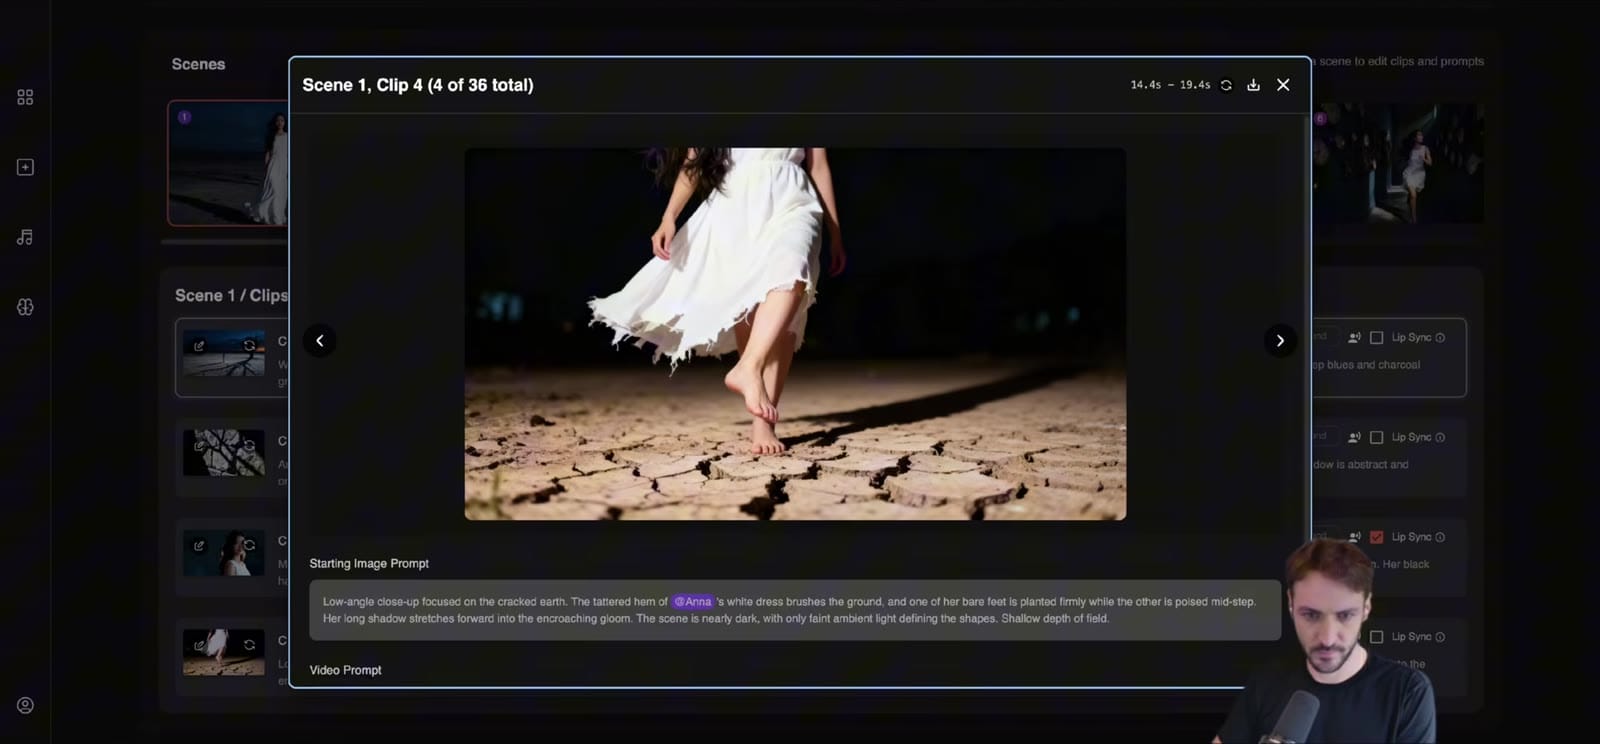
When you render, some clips are marked for lip-sync. Autopilot decides which clips work best for showing the character singing.
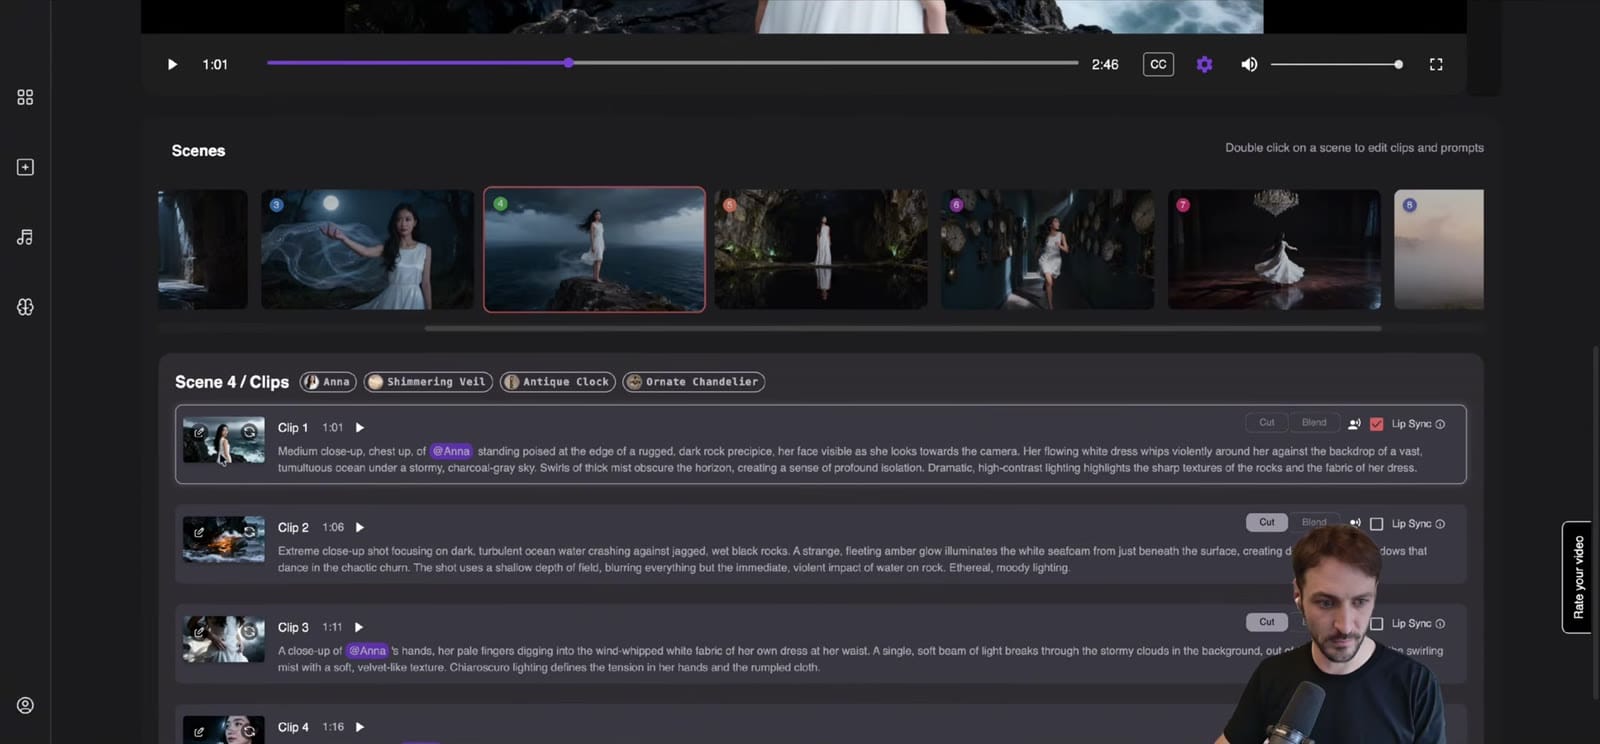
After the first render, Nico finds one clip where the character smiles during a sad line. Neural Frames gives you free re-renders on every video, so he edits that clip's prompt ("her face is visible as she looks towards the camera, looking emotional"), recreates the keyframe and re-renders just that clip. Everything else he leaves as it was.
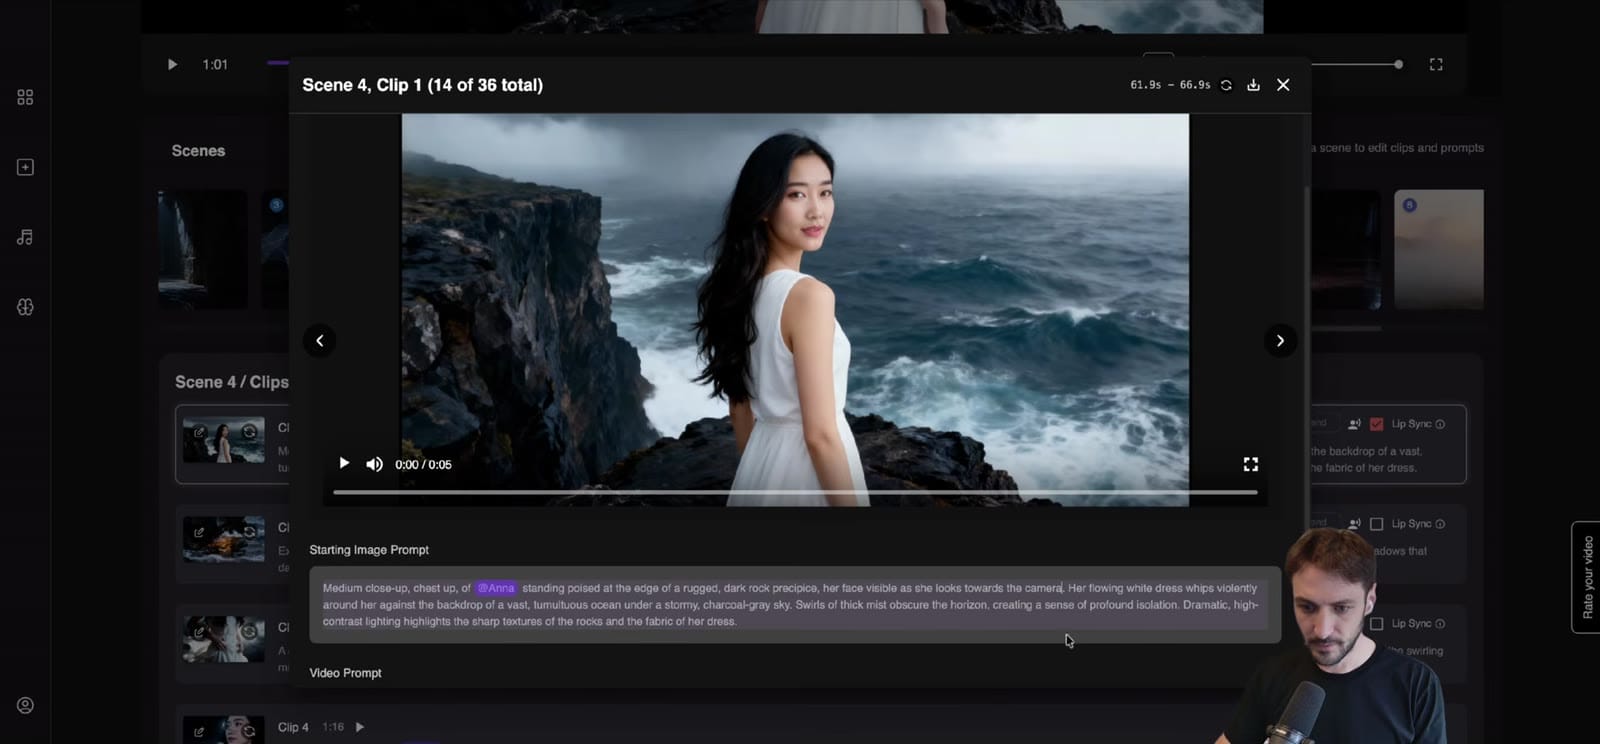
That is the whole loop: upload → basics → character → Vocal Video → storyboard → model → keyframes → render → fix single clips.
Try Vocal Video with your own song →
Get the vocal right
Lip-sync is driven by the voice. The cleaner the vocal, the easier it is for any lip-sync system to map syllables to mouth shapes.
This isn't specific to AI video. Harmonix's Rock Band Network asked artists for a separate dry vocal stem for lip-sync, with no effects and ideally a single voice, because, as their audio guidelines say, "the cleaner/dryer it is, the better it works." The lip-sync company sync. labs gives the same advice in its quality docs: "For song lip sync, isolate and upload just the vocals track."
In Neural Frames you upload the finished song, as Nico does in the tutorial. You can still help the sync:
- Mix the lead vocal so it's clear. A vocal that sits clearly on top of the mix gives better sync than one buried under heavy reverb or a wall of doubles.
- Expect harder sections. Stacked harmonies, call-and-response parts, heavily processed vocals and fast rap passages are the usual trouble spots. If one clip won't sync convincingly, re-roll it or make that moment B-roll.
- If you use a separate lip-sync tool outside Neural Frames, export or separate a vocal-only stem, generate with that, and put the full mix back in the final edit.
How tight does sync need to be? The ITU's broadcast recommendation puts the detection threshold for lip-sync errors at "about +45ms to –125ms (audio early to audio late)", as TV Tech summarises it. That is roughly one frame early to three or four frames late, so viewers notice a mouth moving before the sound much faster than one moving slightly after it. If you edit the export in another program, never nudge the video ahead of the audio.
Pick a performer image that syncs well
Whether you generate a singer or upload a selfie, the image decides a lot. Use this checklist:
- Face the camera. sync. labs says: "Frontal or near-frontal face angles produce the best lip sync results". Save profile shots for B-roll.
- Keep the mouth clear. Hands, microphones, hair and sunglasses over the mouth all hurt sync, according to the same docs.
- Use even light. Harsh shadows across the face and backlighting cause artifacts.
- Pick a mid-shot or close-up for the reference. Frame head and shoulders or waist-up so the face takes up a good part of the image. A full-body photo leaves too few pixels for the mouth.
- Use one face. A group selfie makes it unclear who should sing.
- Choose a neutral or song-appropriate expression. Nico jokes that his selfie looks "a bit too serious". For a melancholic song that's fine. For an upbeat track, upload a photo with some life in it.
When you write a text prompt for a generated singer, keep it short and concrete: age range, hair, wardrobe, one distinctive detail. "Mid-20s woman, black hair, white dress" was enough in the demo.
Make the singing feel real
The most common failure in lip-sync videos, real or AI, is a performance that only mouths the words. Rich Prince Media's main note to artists is to actually sing: "Mouthing the words looks wrong on camera. The neck, chest and breathing do not move the way they do when someone is really singing, and viewers feel it even if they cannot name it."
You can't coach an AI singer, but you can prompt for what makes singing believable:
- Describe emotion and effort, not just the action: "eyes closed, leaning into the line", "breathing in before the chorus", "looking emotional", which is the fix Nico uses in the video.
- Match expression to lyric. A smile on a line about loss is exactly the kind of mismatch to re-roll.
- Use close-ups for the most important lines. The same guide says full commitment matters most "in a tight frame where every breath is visible."
Mix performance with B-roll
A video that is 100% singing face gets tiring, and every lip-sync shot is one more chance for an artifact. Professional editors treat performance as the base and everything else as support.
JG Harding, writing in Sound On Sound, builds the performance edit first and calls the rest "a kind of 'garnish' for this: something that elevates the piece if it's done right." He adds that once the performance edit works, "you'll find that there are quite natural places for cutaway and narrative content to appear."
Vocal Video does a first version of this for you by placing lip-sync only where it fits. To push it further:
- Sing on the hook, wander in the verse. Choruses and key lines are where the face should be on screen. Verses can carry the story.
- Give instrumental sections to B-roll. Nobody should be singing during a guitar solo or a long intro.
- Vary the framing. For shoots, Rich Prince Media plans a wide, a medium, a close-up, movement passes and detail shots. Use the same mix in your prompts: a wide that sets the scene, mid-shots for most of the singing, close-ups for the emotional peaks, details like hands or fabric for texture.
- Let the story advance a bit at a time. Harding recommends spreading narrative content "selectively throughout the piece, so the narrative unfolds bit by bit, paced by the performance."
Pace the edit to the song
Cutting on every beat is the obvious move, and that's the problem. Ian McLaughlin, senior editor at CHIEF., told LBB that beat-cutting "can easily become quite hard visually and predictable. I tend to fold cuts in following the lyrics instead to soften the flow and then punctuate cuts on the beat as a final pass."
Structure matters just as much in performance videos. Editor Vid Price told Promonews that "performance videos need structure as much as narrative videos do". He described saving a long slow-motion shot of the singer for the points where the track kicks off.
In practice:
- Save the strongest visual for the biggest musical moment, like the first chorus or the drop.
- Change the scene when the song changes. A bridge or breakdown is a natural point for new scenery or lighting.
- Hold shots longer than feels natural in quiet passages. Harding says that "holding a little longer on a shot than you think is necessary can be very effective".
- Use Cut for punchy sections and Blend for dreamy ones. Neural Frames lets you set the transition style per clip.
Common mistakes and how to fix them
| Problem | Likely cause | Fix |
|---|---|---|
| Mouth moves but doesn't match words | Buried or heavily processed vocal in that section | Re-roll the clip, or make that moment B-roll |
| Face distorts while singing | Side angle, mouth covered, harsh light | Re-prompt for a frontal view with the face clearly visible |
| Expression fights the lyric | Prompt describes the scene, not the emotion | Add the emotion to the clip prompt and recreate the keyframe |
| Singing feels nonstop and tiring | Too many performance clips in a row | Swap verse or instrumental clips to B-roll |
| Uploaded selfie doesn't look like you | Visual style changes the face | Leave the visual style off for the closest match |
| Vibe is wrong after rendering | Skipped the storyboard check | Change the concept at storyboard stage next time, where changes cost little |
Get it seen
Cut a vertical version. YouTube announced that "you can upload Shorts up to 3 minutes long". That applies to square or vertical videos, so a short song or a long hook section can run as a Short. Render a vertical version rather than cropping the 16:9 one. Neural Frames offers a convenient solution for creating vertical shorts from your landscape long-form music videos with its Smart Crop feature.
Check Content ID before you post your own song. According to YouTube Help, "Any Short that is over one minute in duration with an active copyright claim of any type, including manual claims, will be blocked globally on YouTube." If your distributor runs Content ID on your releases, whitelist your own channel first.
Add lyrics as captions. A Verizon Media and Publicis Media study of 5,616 US consumers found that 69% watch video with the sound off in public, as reported by Forbes. A singing face with no sound and no words is easy to scroll past. Neural Frames has a built-in caption editor that works with its lyric detection.
Make more than one cut. One render can give you a full video, a chorus teaser, and a short performance clip for a pre-save campaign. For more distribution ideas, see our guide to promoting your music.
FAQ
Do I need a vocal stem for Neural Frames Vocal Video? No. In the tutorial Nico uploads the full song, and Neural Frames extracts the lyrics and places lip-sync itself. A clearly mixed lead vocal still gives better results than one buried in effects.
Can I make myself sing in the video? Yes. Upload a photo as your character, as Nico does with a selfie in the second half of the tutorial. Use a front-facing, well-lit photo with your mouth visible, and leave the visual style off if you want the closest resemblance.
Does the character sing in every shot? No. Autopilot picks the clips where lip-sync works best and uses the rest for scenes and B-roll. That's usually what you want, since nonstop singing gets tiring to watch.
Which video model is best for lip-sync? In the tutorial Nico uses Kling 2.5 Turbo Pro and Seedance Pro. Models change often, so compare the current options in the app for your budget.
What if one clip looks wrong? Edit that clip's prompt, recreate the keyframe and re-render only that clip. Every video comes with free re-renders.
How long does it take? The first video in the tutorial took about five minutes of work. Rendering time depends on song length and model.
Does it work for rap? It can, but fast, dense passages are the hardest case for any lip-sync system. Check those sections closely and move a clip to B-roll if it doesn't hold up.
Make your first lip-sync video
Upload a song, pick or upload a singer, choose Vocal Video, and fix the one or two clips that don't fit. That's the whole job.